DaVinci Resolve Studio
Opens in its own window inside Resolve.
Install guide KolWrite
Theme
DaVinci Resolve
Put editable subtitles on your current DaVinci Resolve timeline, cut silence, and make AI edits. Works with Free and Studio on macOS, Windows, and Linux.
Installs both panels
KolWrite-for-Creators-1.0.5.dmg
Installs both panels
KolWrite-for-Creators-1.0.5-Setup.exe
DaVinci Resolve only
KolWrite-for-Resolve-1.0.5-linux.zip
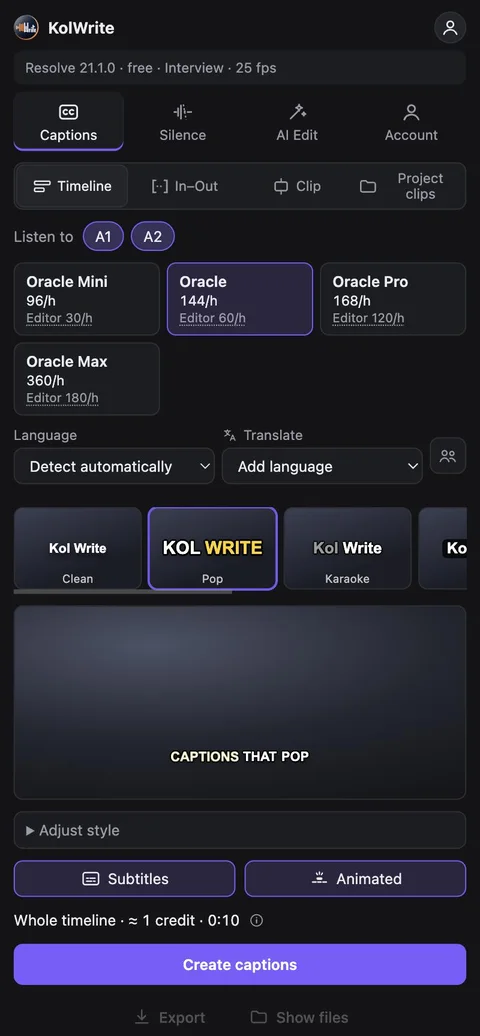
Once it's installed, restart your editor and open the panel from this menu.
Opens in its own window inside Resolve.
Install guideOpens in your browser and connects to Resolve.
Install guideMenu names match the English interface. Don't see it in the menu? Restart your editor once, then check the Troubleshooting section in the guide.
There is one installer for each operating system, and it sets up the panel in every supported editor on your machine.
Running the installer also removes older versions of KolWrite. If you only want the Resolve package (pkg, exe, or a ZIP with Install.cmd), look under Other downloads.
You can use any KolWrite account, including a free one.
The panel matches your editor's language by default. You can switch it under Account > Panel language.
Use Resolve's Inspector to adjust subtitle font, size, and position. Animated style presets are not currently available in Resolve.
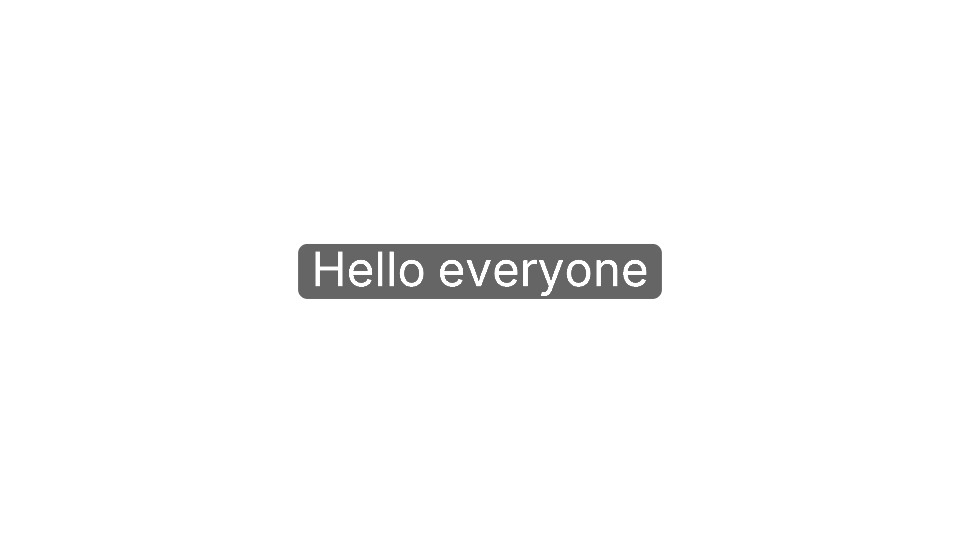
Places editable subtitle items directly on your current timeline without creating a nested caption timeline.
Styled titles are currently unavailable in Resolve: placing them at exact frames would require a nested timeline. Use editable subtitles instead.
The panel automatically chooses between the whole timeline and your In to Out range if one is set, and shows a single line confirming which one it will use.
The entire active timeline.
Just the section between your timeline In and Out points.
The clip currently under the playhead.
Select full clips in the Media Pool without using a timeline. Subtitles go into the KolWrite bin so you can drop them onto any timeline later.
Pick the audio tracks you want to use, such as dialogue only. It renders the exact mix you hear.
The analysis runs locally on your computer.
It sets the level automatically using the room tone and the speech. You get sliders for shortest pause, padding, and keep breaths.
A strip highlights the pauses, and a summary line shows the number of cuts and how much time they save.
It puts the kept sections into a new timeline named after your original with KolWrite Cut added. Your original timeline isn't touched.
Pick a preset, add your own instructions if you want, and review the plan before the sequence is built.
Clean up, Tighten to a length, Short with a hook in the first seconds, Best takes, Chapters.
You get a list of every cut with its timestamp and reason. Uncheck any cut to keep that part in.
Creates a new timeline named after yours with KolWrite Edit appended, complete with chapter markers and optional punch-in zooms.
AI edits spend AI credits based on the tokens used. Creator pricing
Most issues have a quick fix.
Restart Resolve after installing. If you just updated Resolve, run the KolWrite installer again to re-register the panel. On Studio, look under Workflow Integrations. On the free edition and Linux, check Workspace > Scripts.
DaVinci Resolve runs all workflow integrations this way. Blackmagic's developer kit opens each plugin in its own window, and Resolve doesn't allow docking third-party panels. The KolWrite window follows the main Resolve window and stays in front when you switch back to Resolve.
Keep Resolve open and go to Workspace > Scripts > KolWrite. The panel uses the small helper from the installer to connect to Resolve.
Make sure Resolve is installed first, then run the KolWrite installer again. The installer pulls that module directly from Resolve's developer folder.
You can use either. Studio opens the panel right inside Resolve under Workflow Integrations, while the free edition opens it in your web browser from the Scripts menu. Captions, silence cuts, and AI edits work the same way in both.
Workflow Integrations require an activated DaVinci Resolve Studio license. If you don't have one, launch it from Workspace > Scripts > KolWrite instead.
Make sure your audio tracks aren't muted and the media is online, then select the dialogue tracks in the panel. When an audio render isn't possible, the panel reads the source files directly (WAV, BWF, AIFF, MOV, MP4, M4A).
The panel checks the rendered audio against your timeline and stops if they are off by more than a frame. Check for any offline media and try again.
Those work fine. Every timestamp matches your timeline's start timecode and frame rate, including drop-frame.
Edit right-to-left subtitles directly on the current timeline and check the text and layout in Resolve's Inspector. Animated titles are currently unavailable.
The panel shows a cost estimate upfront and won't start a job if you don't have enough credits to finish it. Click Get credits in the Account tab, or switch to a cheaper model.
macOS may ask you to confirm if the package isn't signed. First, check that the SHA-256 checksum matches. Then Control-click the file and select Open, or go to System Settings > Privacy & Security > Open Anyway.
Check the SHA-256 checksum against the one listed on this page first. Once it matches, click More info and then Run anyway.
Canceling is free up until the audio reaches KolWrite. Once it arrives, the job is charged in full. The panel shows the exact credit cost before you confirm stopping.
Install DaVinci Resolve and open it at least once, then run the KolWrite installer again.
This leaves your caption files in Documents/KolWrite untouched.
Window > UXP Plugins > KolWrite · Place captions on a caption track or as animated titles · macOS and Windows
Adobe and Premiere Pro are trademarks of Adobe. DaVinci Resolve is a trademark of Blackmagic Design. KolWrite is an independent product and is not affiliated with or endorsed by either company.